
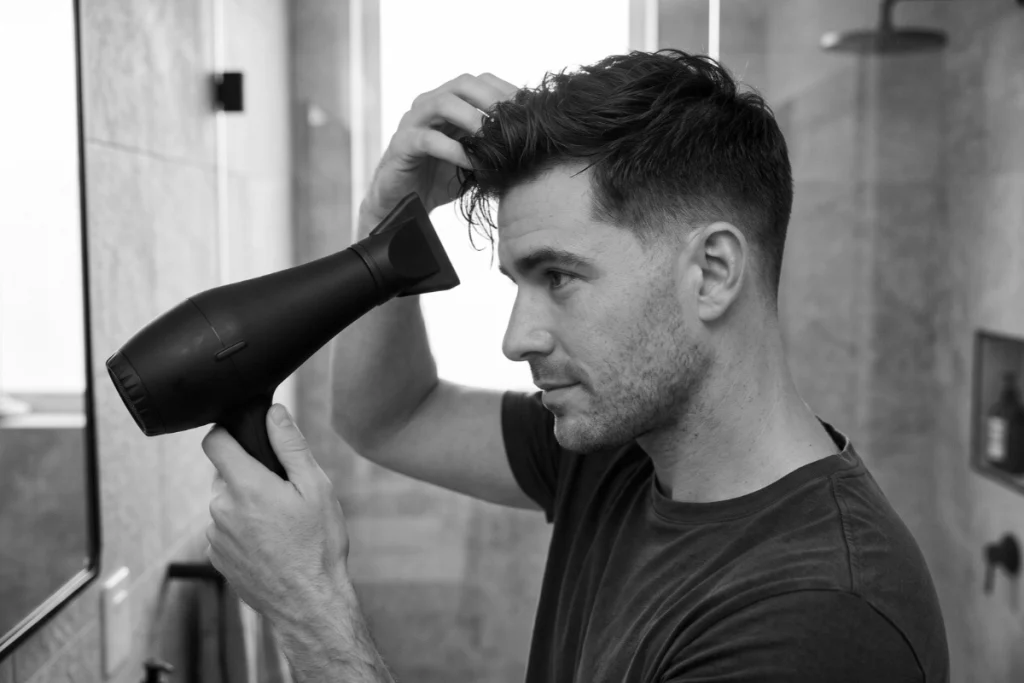
You can have a great haircut and still make a mess of it before you’ve even opened your tub of clay. The front falls flat, the sides puff up, and suddenly you’re spending ten minutes trying to get your hair to behave. You might blame the haircut or your styling product, but the trouble could have started the moment you stepped out of the shower.
And it’s not just about how your hair looks. Rough towel-drying and too much heat can cause damage over time. But giving up your hair dryer completely isn’t necessarily the answer, either. You want to get your hair dry, not give yourself another problem to fix.
In this article
How to Towel-Dry Men’s Hair Without Roughing It Up
Most guys don’t give towel-drying a second thought. You get out of the shower, rub your hair like you’re trying to start a fire, and move on. But if your hair regularly ends up frizzy, tangled, or difficult to style, that rough towel treatment could be part of the problem.

Wet hair is more vulnerable to stretching and breakage, so I’d skip the aggressive scrubbing. Start by squeezing out excess water with your hands, then press a soft towel against your hair to absorb the moisture. Work around your head rather than rubbing back and forth. If you’ve got longer hair, gently squeeze the lengths instead of twisting or pulling them.
You don’t need an expensive microfiber towel to do this properly. A soft, clean cotton towel is fine when you’re gentle with it. I’d put more importance on how you handle your hair than what the towel costs.
How much water should you remove? Enough that your hair isn’t dripping all over your shoulders. You can let it finish drying naturally or use a dryer afterward, depending on what you’re trying to achieve. There’s no reason to keep rubbing until every last bit of moisture is gone.
And if you’ve got curls or coils, be especially careful about rubbing them around. Pressing out the water helps preserve their natural pattern instead of leaving you with a head full of frizz before you’ve even started styling.
Air-Drying vs. Blow-Drying: Which Is Actually Better?
Air-drying keeps direct heat out of the picture. Blow-drying gets your hair dry sooner and gives you more control over where it ends up. I’d go by how your hair behaves and how much time you’ve got. If you’re rushing out to work, waiting for it to dry naturally might not be much help.

Take a quiff. Let the front dry flat against your forehead, then try pushing it up with hair clay. You can keep adding product, but you’re fighting the direction your hair has already settled into. Give the roots some lift while they’re damp, and you’ve got a much better starting point.
That doesn’t mean every guy needs a hair dryer. If your hair naturally dries into a style you’re happy with, I’d leave it alone. Air-drying is also worth considering when your hair is already dry, bleached, or prone to breakage and you don’t need much styling control.
The trouble starts when you crank up the heat, hold the dryer too close, or pull hard with a brush. You’re adding stress that your hair doesn’t need, especially if it’s already fragile. I’d rather use a moderate temperature and take a little longer than turn the heat all the way up.
You can also use both methods. Press out the excess water, let your hair dry naturally while you get dressed, then use the dryer briefly while there’s still enough moisture to move the hair into place. It works particularly well when only one part of your hairstyle needs attention.
How to Blow-Dry Men’s Hair Without Overdoing the Heat
Before you switch on the dryer, work out which parts of your hair actually need attention. Maybe the top needs some lift while the sides just need drying down. You can treat those areas differently instead of spending the same amount of time on every inch of hair.
Step 1: Start with damp hair
Towel off the excess water first. Your hair should still feel damp, but it shouldn’t be dripping. Otherwise, you’re spending extra time under the dryer just getting rid of water before you can properly style it.
If you’ve got tangles, work through them gently with your fingers or a wide-tooth comb. Dragging a brush through wet knots can cause breakage, and there’s no reason to start your routine by pulling at your hair.
Step 2: Use heat protectant if you need it
If you’re blow-drying nearly every morning, have longer hair, or your hair is already dry from bleaching or frequent heat styling, I’d consider using a heat protectant. Follow the product’s instructions and apply it before drying.
Just remember what it’s there for. A heat protectant can help reduce damage, but it doesn’t give you permission to crank the dryer up to maximum. And if your hair is so short that you barely need a dryer, I wouldn’t spend money on another product just for the sake of it.
Step 3: Get the heat and airflow right
Start with low or medium heat and keep the dryer several inches away from your head. Move it around rather than holding the hot air against one patch of hair. If your scalp starts feeling hot, move the dryer farther away or turn the temperature down.
Got separate heat and fan-speed controls? Try increasing the airflow before reaching for more heat. You might get the drying power you need without making your hair or scalp uncomfortably hot. If the stronger airflow is blowing your hair all over the place, turn it back down.
That’s something I’d check when buying a hair dryer. Being able to adjust the heat and fan speed separately is handy, but there’s no need to spend a fortune just to get those controls.
Step 4: Use the airflow to style your hair

Keep the nozzle aimed at the hair you’re moving with your fingers or brush. Work through the top one section at a time, getting the roots and lengths going in the right direction before moving on. You’ll also spot any damp areas without going back over everything you’ve already dried.
Want some lift at the front? Raise the hair gently with your fingers or a brush and aim the air toward the roots as you work through it. For a side part, guide the hair across in the direction you want it to fall. Drying everything straight forward and trying to push it across afterward just makes more work for yourself.
A concentrator nozzle gives you a narrower stream of air, so you can focus on one area without disturbing the hair beside it. Keep the brush fairly loose, though. You’re trying to guide the hair, not yank it into position.
Step 5: Put the dryer down when you’re done
Once your hair is dry and roughly where you want it, stop. Another minute of hot air isn’t going to make your hairstyle hold better just because you’ve spent longer drying it.
If your dryer has a cool setting and you find it helps your hair settle into place, use it. Otherwise, I wouldn’t worry about it. I’d rather get the temperature and airflow right from the start than rely on a final blast of cold air to finish the job.
Your Haircut and Texture Change How You Should Dry It
Two guys can have the same fade and need completely different drying routines. One has barely any hair on top, while the other has several inches he’s trying to style. The fade isn’t what matters here. It’s the length you’ve kept on top, how your hair behaves, and what you want it to do.
With a buzz cut, there’s no reason to bother with a dryer. A short textured crop won’t need much attention either, unless you’ve left enough length at the front to style the fringe. There’s no point spending five minutes blow-drying hair that’s already falling exactly where you want it.
Quiffs, side parts, and slick backs need a bit more thought. With a quiff, most of your attention will probably be on the longer front rather than the closely trimmed sides. A slick back needs the hair farther back on your head to dry in the right direction, too. Otherwise, you can get the front looking good while the hair behind it keeps wanting to fall forward. And if you’ve got a stubborn cowlick near your part, that’s where I’d spend more time rather than repeatedly drying the areas that already behave.
Fine or thinning hair needs a lighter touch. Blast it straight down against your scalp, and you can end up making it look flatter than it really is. I’d use my fingers to lift the roots gently and avoid pulling everything tight with a brush. A dryer can help fine hair look fuller, but it isn’t going to make the hair itself any thicker.
With curly or coily hair, I’d be more interested in keeping the natural curl pattern intact. Constantly brushing and blowing the hair around can leave it looking frizzy, especially if you’re trying to keep your curls defined. Air-drying works well when you’ve got the time.
Otherwise, try a diffuser with gentle airflow, lifting sections of hair into it rather than blowing the curls around with the dryer nozzle. For tight curls or coils that need detangling, it’s generally better to work through them gently while they’re damp and conditioned rather than brushing them out dry.

And if you’ve got thick, longer hair, don’t assume it’s dry just because the outside feels dry. The hair underneath can still be damp. Work through it in sections so you can reach those areas without repeatedly heating the ends you’ve already dried.
Why Your Hair Looks Flat, Frizzy, or Rough After Drying
Before you reach for more clay or blame your dryer, work out when your hair started looking wrong. Was it already flat when you finished drying, or did it lose its shape after you added product? Those are two different problems.

Take flat hair. If the roots are already lying against your scalp before you apply anything, you’ll probably need to change how you’re drying them. But if your hair looks good until you work in clay or hair paste, the product might be too heavy, or you could simply be using too much. Try a smaller amount before deciding you need something new.
Frizz often starts earlier than you think. If your hair’s already fluffy before you’ve picked up the dryer, think about how you’ve been using your towel. Rubbing it roughly can make things worse, particularly with wavy or curly hair. If the frizz appears while you’re blow-drying, try gentler airflow and stop brushing the hair in every direction. I’d change those habits before spending money on another anti-frizz product.
If your hair feels rough or brittle, take a look at how often you’re using high heat. Repeated heat exposure can contribute to damage, especially if your hair’s already been bleached or regularly heat-styled. I’d turn the temperature down and make sure you’re using a decent conditioner. It can help your hair feel smoother and easier to manage, but don’t expect it to permanently repair split ends or undo damage that’s already happened.
What about a hairstyle that looks great when you finish but starts falling apart ten minutes later? Check whether the roots are properly dry, particularly if you’ve got thick or longer hair. Moisture left underneath can cause the hair to change position as it finishes drying. Make sure those areas are dry before deciding you need a stronger pomade.
And finding a few loose hairs in your towel doesn’t automatically mean you’ve damaged them with the dryer. Hair naturally sheds, while strands that snap from breakage are a different problem. If you’re noticing sudden or unusual shedding, or new patches of thinning, I’d speak to a dermatologist rather than assume your drying routine is responsible.
Beard Beasts Verdict
I’d keep your drying routine as simple as your haircut allows. If your hair falls into place after a gentle towel-dry, great. You don’t need to introduce heat just because you’ve got a dryer sitting in the bathroom.
For longer tops that need some lift or direction, I’d use the dryer rather than struggle with styling products afterward. Get the hair where you want it while it’s damp, keep the heat sensible, and stop once it’s dry. Spending longer under the heat won’t automatically improve your hairstyle.
And if getting your hair right every morning takes ages, mention it to your barber. Ask them to show you how they’d dry your particular cut, or whether there’s a way to make it easier to manage. That’s where I’d start before spending hundreds on a new dryer. You might get a better result by changing the routine you’ve already got.